Showing posts with label birthday cookies. Show all posts

Friday, May 22, 2015

Birthday Cookies

These are a couple of sets of birthday cookies I did for a friend and for a friend's daughter. For the candle, I used a cutter like this one and just cut off the bottom section. Works well, but I really want to get a chubby candle cutter a long these lines or like this, but until then, this works fine. I also did some birthday cupcakes for Kelly, which were just plain yellow cake with vanilla buttercream icing.

The writing on both of these is horrible! Even though I'd received my AWESOME PME Supatube 1.5 writing tip by then, I'd been too lazy to mix a separate batch of piping consistency icing and didn't thicken these enough to keep the letters from running together. Other than that, I was good with them. 

The turquoise color for Hallie's cookies was made using a suggestion from Jill of Funky Cookie Studio. Everything I'd tried kept coming out too green and then one day I saw something she posted and inquired how she achieved the shade. She used electric blue and a smidge of avocado green. I was thinking I followed her suggestion to get my color, but when I looked it up just now, I am certain that I do not own electric blue, so I may have used royal blue and avocado green, which is why mine isn't quite as bright as hers were - makes sense now. Pay attention, Beth! haha!

Birthday Cookie Platter

Cupcakes
I did Kelly's a few weeks before doing these for Hallie's and decided to do the candles differently  and love the results.

Birthday Cookie Set

Sunday, June 29, 2014

Tie Dye, Teddy Bears, Birthdays and Anniversaries

I haven't really done a lot this month, but here are the few things I've done. My friends were having a 1st birthday party for their son/grandson. They call him Sawbear, so teddy bear cookies were a must. The grandmother made his party hat and I based my designs and color choices on that.

Teddy Bear Cookies, 1st Birthday Cookies, Party Hat Cookies


My long time friend, Anna, had her birthday on the 11th of this month, but was at Disney, so I waited a week later and took her these to surprise her for her special day. She'd said she wanted peace signs, moons and suns, but I knew much better what I wanted to do for her. Turns out I was right. They were beyond anything she'd even thought about and she loved them.

Tie-dye cookies, Groovy Cookies

I also did a few #3's for my great nephew's 3rd birthday party as cookie favors for his party guests. Truly, the date slipped up on me and I threw this together at the last minute. I'd really wanted to do some much more special for the big day. :(

3rd Birthday Cookie Favors


Then I did some birthday and anniversary cookies at the request of my friend Amy. Her husband's birthday falls on the same day as their anniversary. She said that he always asks her favorite thing about his birthday and her answer is that she gets a gift, too! :) I had no idea what to do on the anniversary ones, so I stalked her facebook photos and found two shots from their wedding day. Her flowers were yellow calla lilies, so I opted to do the hearts in yellow, although the color they dried was a little more orange than I would have liked.

Anniversary Cookies, Champagne Cookies
Champagne cookies
 
Birthday cupcake cookies, Birthday Candle cookies
The birthday boy with his cupcake cookie and B-on-a-Stick, the baker!
Oh yeah, I'd done these last month for my friend Alison's mom's birthday. We loved how perfectly the ribbon and the cookies matched - the ribbon was bought completely separately from me doing the cookies. I also LOVE the giant cello bag covering the entire tray - that was Alison's idea - and I may have to use it more often!

Birthday cupcake cookies

Friday, December 6, 2013

War Eagle, Roll Tide and Happy Birthday Cookies

Living in Alabama, there is no escaping college football. This year was a particularly exciting Iron Bowl and I did cookies for a couple of Iron Bowl parties friends were having.

War Eagle cookies, Roll Tide cookies, Tiger Paw cookies

Auburn University cookies, University of Alabama Cookies, Paw Print Cookies


I also decided to try out the quick dry method for royal icing. My life may have been forever changed! Ha! I put the cookies in front of a fan on high for 30 minutes and then in the oven at 170 degrees (warm) for 30 minutes and they were dry enough to arrange/stack on a tray. I don't think I would do it all of the time, but for a last minute miracle, which I often need, since I wait to the last possible second to do these, well, pretty much anything else, too, it is a life saver.


Then my brother's birthday was later the same week and since Auburn pulled off the seemingly impossible and beat Alabama, and my brother is a huge Auburn fan, I did his birthday cookies in Auburn colors. Once again, I found myself waiting until the last minute to do them, so I used glaze on these, so that's why they are so shiny.

Happy Birthday cookies, Cupcake Cookies, Birthday Candle Cookies


I also did some Mr. Hankey and family cookies for him, but I won't show those here!

Friday, June 7, 2013

Birthday Butterflies

Got a message from a friend on Sunday asking if it would be possible for me to make some butterfly cookies for his girlfriend's birthday, which is on Saturday.  Problem was that he lives in Iowa and she in Kansas, and I am in Alabama.  I think the world of him and am so happy for him with his new relationship, so I decided that even if it meant staying up late, I would get them done and shipped out in time for her birthday.  I had a lot of fun with these, because he just let me run wild, instead of specifying how they should look.  I had to rein myself in and limit the colors I would use, otherwise I would still be working on these!  lol


He didn't tell me how many he wanted, so I decided to do a dozen butterflies and you cannot have butterflies without flowers, so I did a dozen flowers too.  Actually there were 14 butterflies and 12 flowers. 

I wanted to make sure these did well in shipping, so I bagged the cookies back-to-back in sets of two in little cello bags and for the first time heat sealed the bags.  I had wondered about this and found something online recently about using a curling iron or flat iron to close cello bags, so I went out and bought a new, cheap curling iron and used a med/low setting and it worked like a charm.  I then took the 13 cello bags and wrapped, wrapped and wrapped them some more in plastic wrap. After that I filled in the box with lots of plastic wrap and enclosed the box's contents with tissue paper and wrapped it up with some of my favorite paper I found at Big Lots years ago and bought every single roll they had.  Then I made a big poofy bow for it.  


I had planned to ship them through a friend's store who has a volume shipping account with UPS to keep the shipping costs down, but my schedule didn't allow me to get over there, so I had to go to the dreaded UPS retail store.  Have I ever mentioned just how much I dislike the UPS retail store near me?  If not, well, I do - mainly because I am so cheap and it costs an arm and a leg to ship with them.  And since I didn't have my own packing supplies and a shipping box, I had to buy those too.  All total the UPS store charged me $31.47 to ship and pack a 2.0 lb. package.  Fortunately, I am being reimbursed for the shipping cost, but even still, I like to be just as frugal with other people's money as I am my own, so it pained me greatly to pay that much!   

The package is scheduled for delivery today and I'm once again stalking the tracking page!  It is out for delivery, but we all know it could be as late as 7 pm before it is delivered.  I think I am more excited than he is about her getting these.  I even signed up for UPS text messages to alert me when it has been delivered.  I'll update when it has been delivered!

Friday, May 31, 2013

Guess Who is One?!?!

Did these for a friend's little boy's 1st birthday.  The party is tomorrow, so I really should wait before posting the pics, but it isn't like anyone actually sees my little piece of blogdom anyway.  Although they turned out really cute, the icing colors dried very, very differently than what I'd had in mind.  Fortunately my friend is super easy-going and said she trusted my judgment if I thought they still looked okay.  I also loved that she just let me run with it - gave me only colors she wanted me to use and let me do my thing, which I love, instead of trying to make something very specific.

This is how they dried.  See, they still look pretty cute, but the colors are so different than the wet version below.

The colors while they were still wet were more what I had in mind, but am still happy with the dried result above.

I'd been looking for the perfect #1 cutter for a couple of months now and found one I really liked called Fancy 1 Cutter from Cheap Cookie Cutters.com, but they were out of stock on it and they never responded to my email regarding making a special order for that cutter, although I did get a response pretty quickly through their facebook page, but it told me to email the question.  So as the time grew closer I ended up settling for a very simple #1 that didn't have a base on it that I picked up at a local bakery supply.  So I cut out twice as many 1's as I needed and cut off the tops of 1/2 of them and then cut out a notch with the bottom of the cutter so that the pieces would fit snugly onto the bottoms of the simple 1's to create a base for them.

You can see the ugly undecorated 1's in this shot and how I notched out the base to attach it to the simple #1.

Sunday, May 12, 2013

Cookies for Some of Life's Big Events


My mom's first cousin, to whom I've always been close was having her milestone 60th birthday, so for her surprise party, I did a bunch of her favorite butterflies, since I only have a gazillion butterfly cutters, most of which are the same.  I would have loved to do these in a larger variety of colors, but was asked to have them match the party colors of turquoise and white.  That just gives me something else to try later!


As a belated birthday gift, a friend gave me this awesome customized cookie platter.  It even has representations of my Pac-Man and flower cookies on it!  And btw: it is HUGE!


One of my cousins on my dad's side of the family died last weekend after a prolonged battle with Progressive Supranuclear Palsy and I brought these flowers for family eats after her lovely service on a dreary rainy day because they looked happy.  My mother-in-law helped me put together a beautiful flower arrangement for them as well - remember, I've mentioned my MIL before - she's awesome and did a great job on the arrangement.  PTL, you are now healed, dear Suzy.


I did these graduation cookies for the daughter of a long time friend - we actually graduated high school together.  I rushed and scrambled to get them done and in the mail because her party was supposed to be on the 11th, however I had neglected to read an email much earlier in the week from her mom saying that they'd changed it to the 26th because storms were in the forecast for the 11th.  So, dummo me sent far fewer than I'd hoped to do for her and a week before her graduation and a 2 weeks before her party!  But I really like the way the RI transfer of the school (also my alma mater) logo came out, except for the black background seemed to leach through and make the red a little bit speckled.  I've heard from them and they loved them, so mission accomplished.

Albertville High School Graduation Cookies

Here are a few more graduation cookies I did for kids of friends in different schools:

Oxford High School graduation cookies

McAdory High School graduation cookies

Sunday, April 28, 2013

More Birthday Cookies and MY Birthday Cake

So I did some more cupcake cookies for a friend's birthday last weekend.  I did them in pink and white and I made sprinkles for them by making tons of tiny straight lines of royal icing on wax paper and then rolling and crushing the sheets after they had dried.


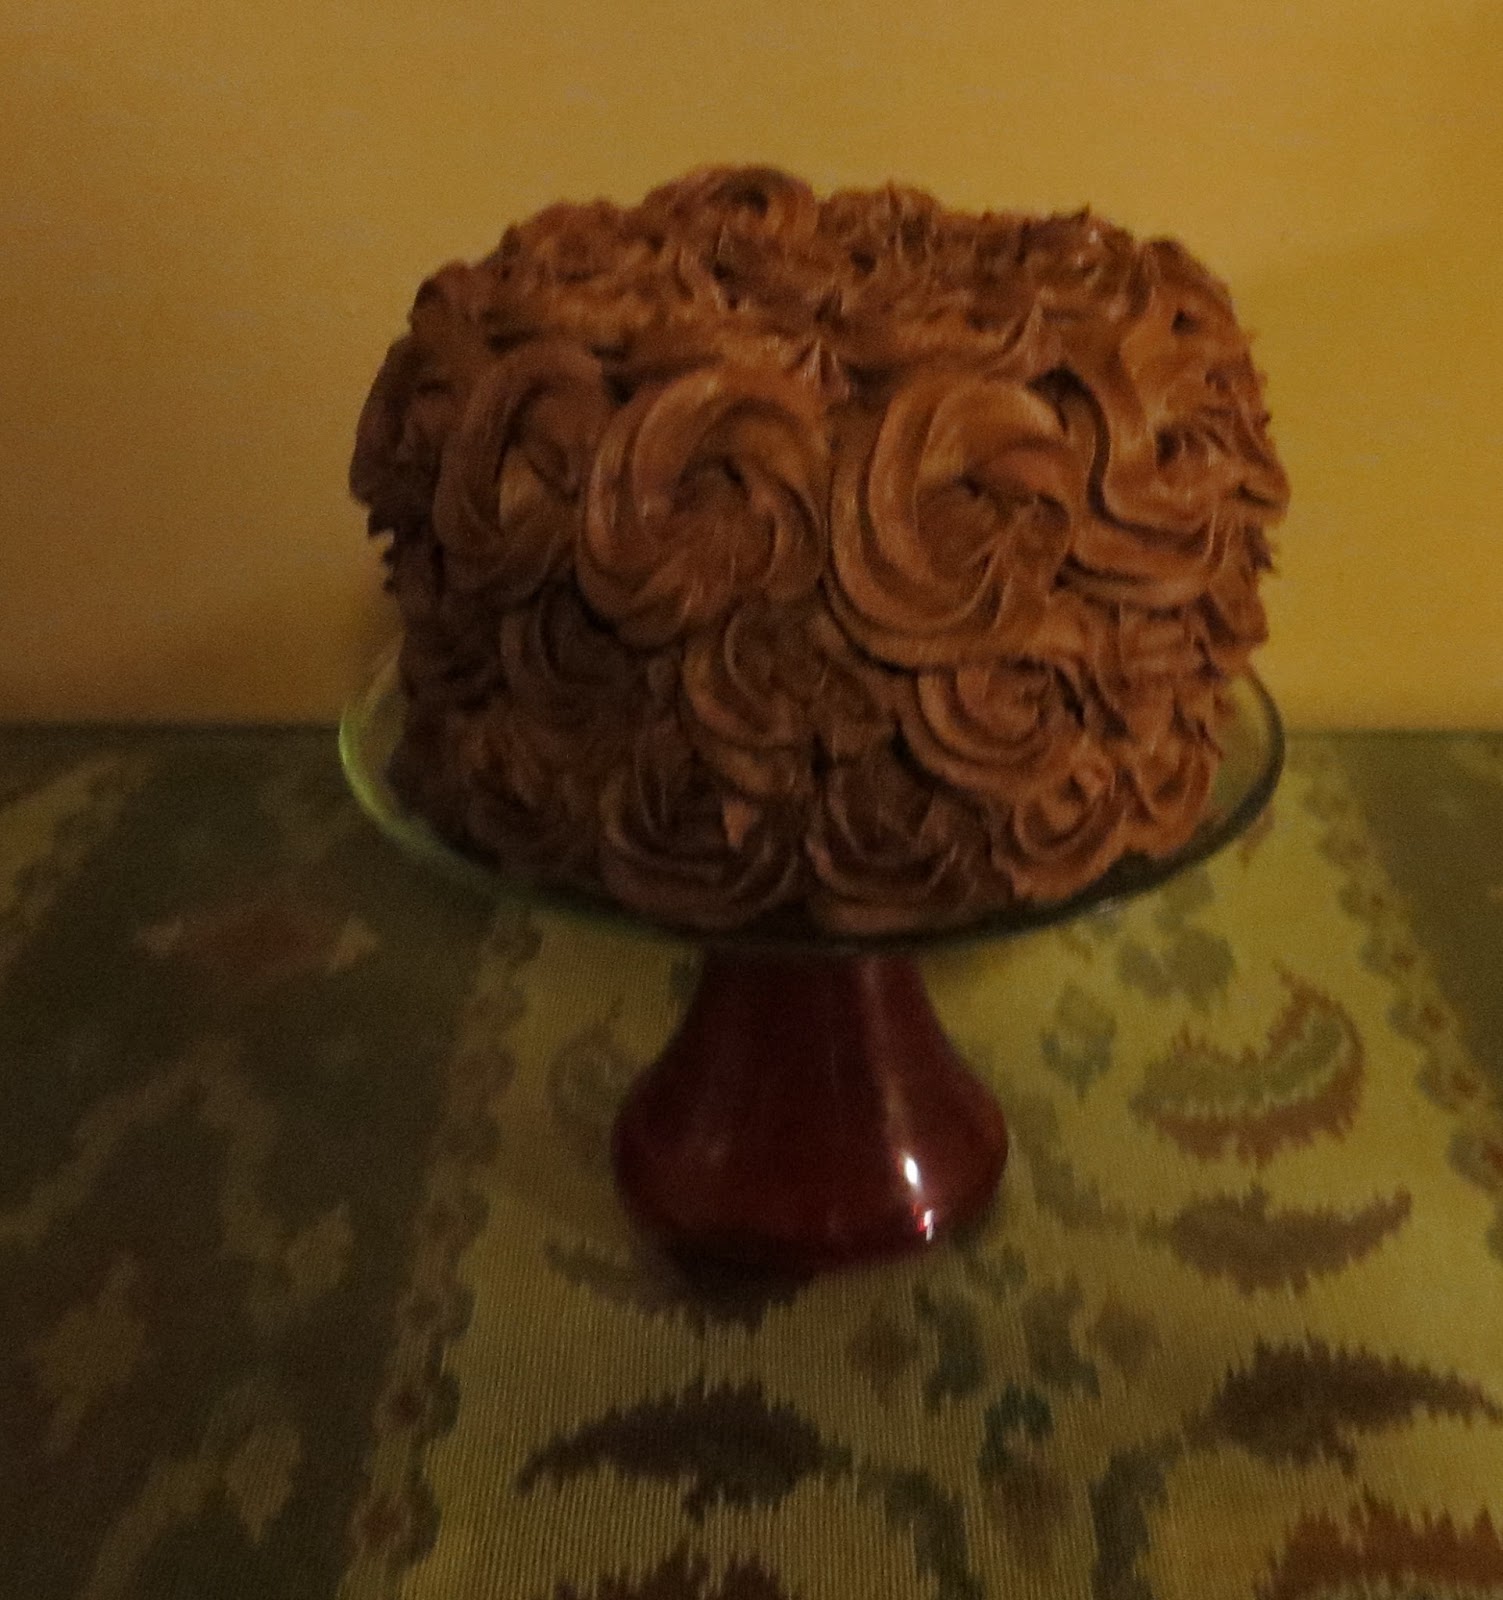
My birthday was Wednesday and my sweet hubby called me on his way to work Tuesday morning to tell me that with all he had going on at work that he wouldn't have a birthday cake for me on my birthday, but that he would get one later in the week.  While most people might be disappointed by such news, I was THRILLED because it meant that I could finally try out my two new 6"x 3" round cake pans my mom gave me as an early birthday gift. I told him not to get one and then started running ideas through my mind.  First you must know that I stink with cakes!  I can never get them to look just how I want - just can't seem to do the base frosting quite smooth enough for my liking.  I've been dying to try this chocolate cage idea from Doughmesstic again, but had a bad experience by not following her warning about white chocolate as a newbie when I tried to do one for Easter with a lavender white chocolate cage, so I talked myself out of doing my birthday cake with a dark chocolate cage.  Instead, I decided to try doing a swirly rose cake.  Sometimes I'm just dumb enough to give anything a try and sometimes I am even pleasantly surprised with the outcome, like  I was with my swirly rose birthday cake.  The cake was four layers (the 6x3's cut into two layers each) and the frosting was chocolate buttercream with a hint of coffee extract in it.  It was sooooo good and like I said, it I thought it turned out pretty cute for a first time effort.


I ran out of my awesome mocha-ish buttercream partway through it, so I had to stop and make more.  I just made a 1/2 recipe to finish off and had ALMOST enough - the swirly roses on the top are kind of thin compared to the rest of the cake, but I was able to finish it off.  Besides, there is so much frosting on this cake that you really didn't miss out on any from the thinnish top.

Of course, we see them everywhere now, but I watched this video and decided I could do this. I believe the original idea of doing cakes this way came from I am Baker, here.

And oh my gosh, I almost forgot to show off all my new cutters I've received as gifts from friends for my birthday!!  I hit the JACKPOT!!!  And I got a lot of great cutters too! ;)


Check out the haul from my friend Missy.  My cat Helen was enthralled by them as well and that was the best I could do photo-wise in terms of getting her to stay out of the picture!  Missy and I have never met in person but became friends through Facebook back in 2009 - I guess we are like modern-day penpals!  lol  Anyway, look at the princess set with a castle, tiara, and shoe; the summer set of a margarita, sunglasses and flip-flop; and the boy set of a car, airplane and train; not to mention all of that luster dust and gel colors.  I was beside myself!  Oh, and I had never had a caramel apple, so she sent me a Colorado Caramel apple and I must say, it was divine!

These were a total surprise from my friend Mary, one of the surprise recipients during "Operation Spread a Little Sunshine."  I was shocked when I found them in my mail and totally overwhelmed when I opened the box and saw what all she'd sent to me!!  There was a kitty set that has lots of kitties in different positions as well as a little mouse; there was a graduation set that contained a cap, gown, diploma, award, apple and owl.  Then some others that she thought I might like - a rooster, a chick, a penguin (which I can totally see using for a boot with a little trimming), a palm tree and a sunburst.

These are from one of my oldest friends - we were best friends in 2nd grade - Christy. She sent me a message the other day asking for my address and it never crossed my mind again that she'd asked for it.  Then on my birthday, I went to my mailbox and found a package from her!  Everyone knows I love kitties (I only have 4 indoors, but tend to almost an entire community of strays!), so she did the great cat face/head and a playful kitty.  Then there's a hen!!!  I was so excited by the hen, because among my strays is a little banty Welsummer hen who chose me last year - she lives in my back yard during the day and sleeps in my camellia beside my front porch at night.  Her name is Chicky Boom and now I can make a Chicky Cookie!  Chicky's pic is my blogger profile pic above and the inspiration for the name of this blog.

Sunday, April 7, 2013

Birthdays Galore!

I did cookies this week for the kids of a couple of friends who were having birthdays during the week.  For the little boy, they had nothing specific in mind, so I remembered that among the cutters my mother-in-law had given me was a birthday set.  I did cupcakes and party hats.  For the technique of giving the cupcake icing dimension, I once again used the tutorial provided by Lila Loa and used basic blue, green, yellow and white. Then, I just played with the party hats and mixed up the basic colors into fun mixes.


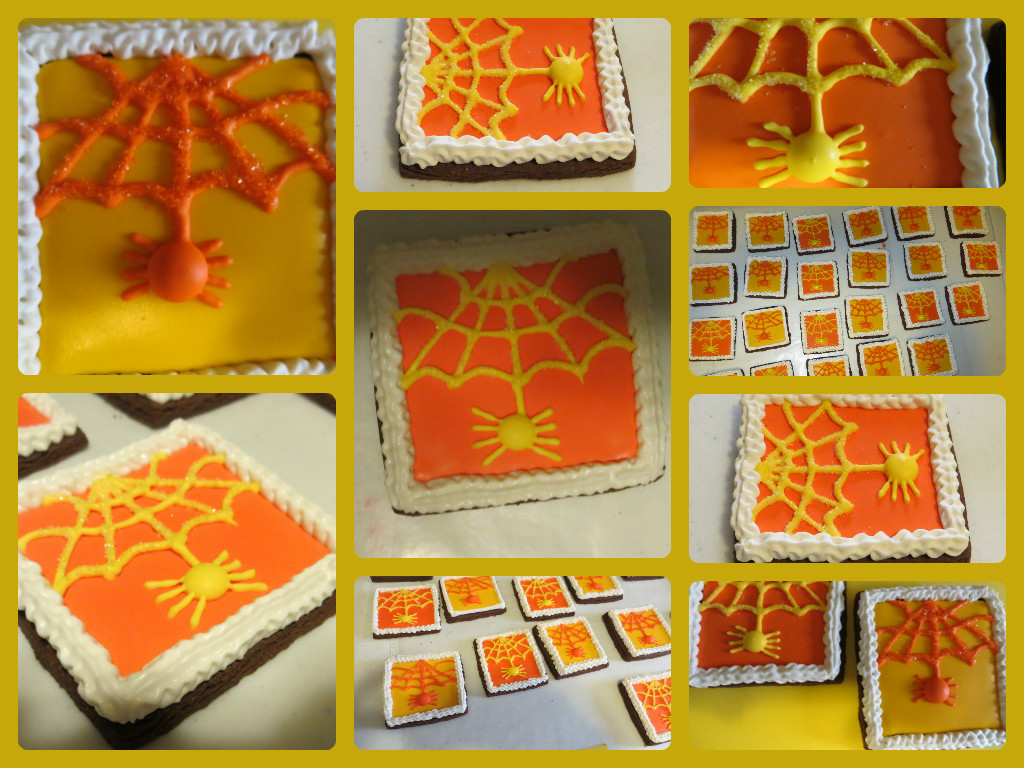
For the 10 year girl who is a huge animal lover and was having a creepy crawly birthday party with someone bringing an alligator, a tarantula, a snake and some other animals that induce the crawling of my skin, I did these cookies that were shown in this tutorial by Bake at 350', only in the party colors of yellow and orange and I used sanding sugar instead of luster dust.


I ran into some funny things while working on these.  I'd had issues with the yellow I'd used on the Easter Cookies, which was Electric Yellow, so I decided to try a different yellow this time around.  It had come out okay on the boy birthday cookies I had just finished, so I didn't think anything about using it on the spider cookies.  So, I flooded an area of the square chocolate cookies with Egg Yellow and just about died laughing after it dried.  It looked like pumpernickel cheese toast!  


I was also extremely indecisive about how I was going to add sparkle to these.  Initially I decided I was just going to use orange and yellow sanding sugar since I already had those, instead of going to the expense of getting luster dust (have I mentioned yet just how cheap I am?)  Then when I did a test one while the web was still wet, I just didn't like how goopy (sorry SpellCheck, that you do not recognize that word, but that's the best and only description I can come up with) it looked.  So I then decided I'd later make a run to Hobby Lobby and get luster or pearl dust in both yellow and orange and just dry brush it on.  That was almost $10.00 I'd be forking out, so I called my mother-in-law and asked if she would be willing to meet me there so we could each buy one with a 40% off coupon.  She agreed and we decided we'd likely go around 6 or 7 pm, which was a good 6 hours away at the time.  Then after that goopy one dried, I decided it didn't look so bad after all, so I called my MIL back and cancelled our little shopping outing.  So I tried another and once again didn't like it and decided I would just go to Hobby Lobby a little later and just get yellow pearl dust and use it on both colors, so I wouldn't need a shopping buddy since I would be buying only one item.  I went ahead and piped the webs and spiders at that point so that they would be dry when I was ready to apply the pearl dust. Then came the need for a Saturday afternoon/early evening nap, which turned into a two hour nap (...a two hour nap...).  I awoke around 7:30 pm and simply could not force myself to take a shower and get ready to go to Hobby Lobby, so I googled applying sanding sugar to dry cookies.  And what do you know?  I found this grand little gem from Sugarbelle on University of Cookie about doing just that! So, I was able to stay grungy and in my weekend around the house uniform of a t-shirt and yoga pants and do the dry application of the sanding sugar.  And might I say, I really liked how much control brushing the meringue powder and water mixture on before adding the sanding sugar gave me.  Here's a look at the comparison of the cookies done while the webs were still wet versus those on which the sugar was applied after the webs were dry. (Wet application top row; dry application bottom row)


Had never done a border of anything other than dots, so using the #15 star tip was a new thing for me.  You can see that I definitely need work on that piping skill, but I think they turned out really cute as a whole.  Thanks to all of the helping hands out there online who helped me make both of these birthday sets of cookies!