
For the 10 year girl who is a huge animal lover and was having a creepy crawly birthday party with someone bringing an alligator, a tarantula, a snake and some other animals that induce the crawling of my skin, I did these cookies that were shown in this tutorial by Bake at 350', only in the party colors of yellow and orange and I used sanding sugar instead of luster dust.
I ran into some funny things while working on these. I'd had issues with the yellow I'd used on the Easter Cookies, which was Electric Yellow, so I decided to try a different yellow this time around. It had come out okay on the boy birthday cookies I had just finished, so I didn't think anything about using it on the spider cookies. So, I flooded an area of the square chocolate cookies with Egg Yellow and just about died laughing after it dried. It looked like pumpernickel cheese toast!

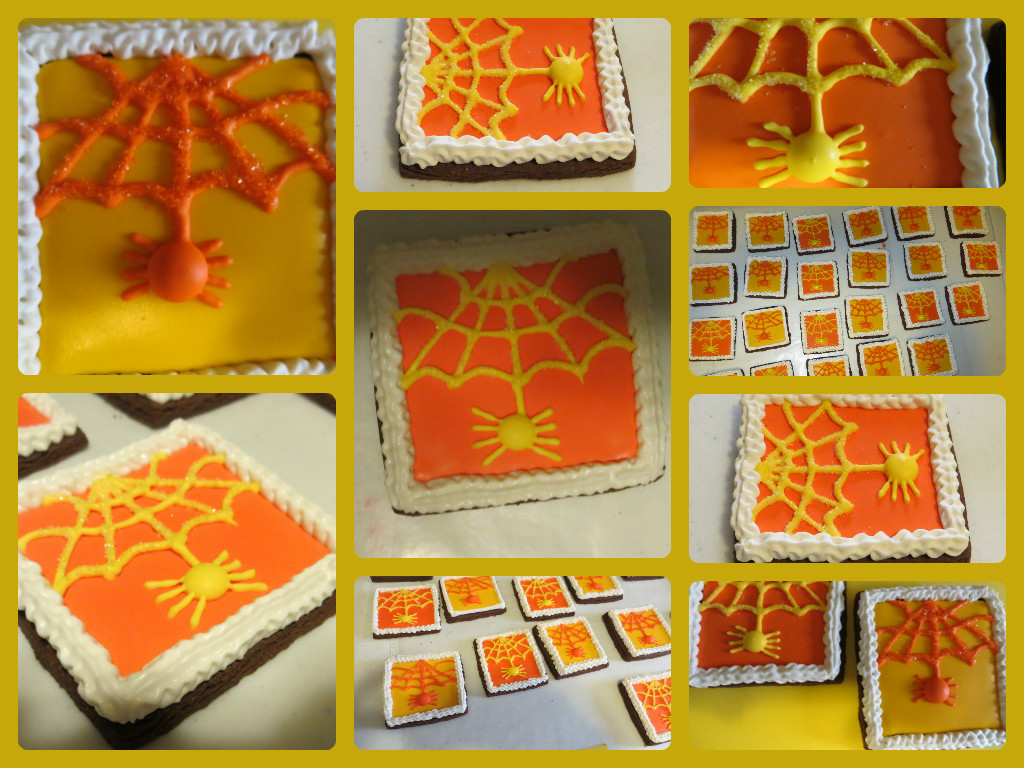
I was also extremely indecisive about how I was going to add sparkle to these. Initially I decided I was just going to use orange and yellow sanding sugar since I already had those, instead of going to the expense of getting luster dust (have I mentioned yet just how cheap I am?) Then when I did a test one while the web was still wet, I just didn't like how goopy (sorry SpellCheck, that you do not recognize that word, but that's the best and only description I can come up with) it looked. So I then decided I'd later make a run to Hobby Lobby and get luster or pearl dust in both yellow and orange and just dry brush it on. That was almost $10.00 I'd be forking out, so I called my mother-in-law and asked if she would be willing to meet me there so we could each buy one with a 40% off coupon. She agreed and we decided we'd likely go around 6 or 7 pm, which was a good 6 hours away at the time. Then after that goopy one dried, I decided it didn't look so bad after all, so I called my MIL back and cancelled our little shopping outing. So I tried another and once again didn't like it and decided I would just go to Hobby Lobby a little later and just get yellow pearl dust and use it on both colors, so I wouldn't need a shopping buddy since I would be buying only one item. I went ahead and piped the webs and spiders at that point so that they would be dry when I was ready to apply the pearl dust. Then came the need for a Saturday afternoon/early evening nap, which turned into a two hour nap (...a two hour nap...). I awoke around 7:30 pm and simply could not force myself to take a shower and get ready to go to Hobby Lobby, so I googled applying sanding sugar to dry cookies. And what do you know? I found this grand little gem from Sugarbelle on University of Cookie about doing just that! So, I was able to stay grungy and in my weekend around the house uniform of a t-shirt and yoga pants and do the dry application of the sanding sugar. And might I say, I really liked how much control brushing the meringue powder and water mixture on before adding the sanding sugar gave me. Here's a look at the comparison of the cookies done while the webs were still wet versus those on which the sugar was applied after the webs were dry. (Wet application top row; dry application bottom row)

Had never done a border of anything other than dots, so using the #15 star tip was a new thing for me. You can see that I definitely need work on that piping skill, but I think they turned out really cute as a whole. Thanks to all of the helping hands out there online who helped me make both of these birthday sets of cookies!
Wow you are extremely creative maybe we could bake some together one day!
ReplyDelete